Monday, August 3, 2009

Speed Up Your Site! 8 ASP.NET Performance Tips 4

How can I improve the speed of my site?

Most ASP.NET web servers perform a lot of unnecessarily repetitive work.

For example, suppose you have a page with a DataGrid bound to a table called Products. Every time a user requests the Products page, ASP.NET has to:

  1. Look up the products data in the database.

  2. Process the page.

  3. Databind the product data.

  4. Render the results to HTML.

  5. Output the results to the browser.

If we assume the products list changes infrequently in comparison to how often it is requested by a user, most of that work is unnecessary. Instead of doing all that work to send the same HTML to all users, why not just store the HTML and reuse it until the Products table changes?

Solution

The ASP.NET cache provides the key to efficient storage and reuse of our HTML.

There are several ways to use the cache; we'll focus on the easiest tricks to get you started, then point you toward some resources that will help you tackle more advanced ways to utilize the cache.

The simplest solution is to use the OutputCache directive on your pages or user controls. For example, the following page will be cached for one hour (3600 seconds). You can refresh the page all you like, but the value of DateTime. Now won't change until the page is cleared from the cache. Here's the code that retrieves the current time:

Example 15.7. OutputCacheSimple.aspx (excerpt)

<%@ Page Language="C#" AutoEventWireup="true"
CodeBehind="OutputCacheSimple.aspx.cs"
Inherits="chapter_15_performance.Performance.OutputCacheSimple"
%>
<%@ OutputCache Duration="3600" VaryByParam="none" %>


Output Cache Example


Output Cache Example


<%= DateTime.Now.ToLongTimeString() %>


Figure 15.5 represents our page at 11:01:41 p.m.
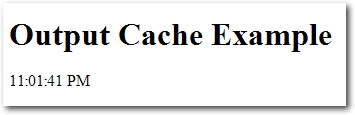
Figure 15.6 shows what it looks like at 11:23:01 p.m.
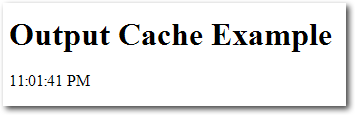
Notice that the time didn't change, as the page wasn't re-rendered.

Now let's look at a slightly more complex caching example:

Example 15.8. OutputCache.aspx (excerpt)

<%@ Page Language="C#" AutoEventWireup="true"
CodeBehind="OutputCache.aspx.cs"
Inherits="chapter_15_performance.Performance.OutputCache" %>
<%@ OutputCache Duration="30" VaryByParam="none" %>


Output Cache Example


<% System.Threading.Thread.Sleep(5000); %>

Output Cache Example


Time written by ASP.NET:
<%= DateTime.Now.ToLongTimeString() %>


Time written by Javascript:


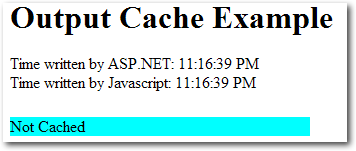
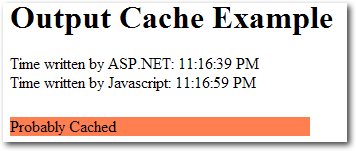
The above page writes out the current time according to both ASP.NET (server side, cached) and JavaScript (client side, not cached). Additionally, if the JavaScript time is more than two seconds after the ASP.NET time, the page will report that it has probably been cached.

The first time this page is viewed, there's a five-second delay (due to the call to Thread.Sleep), then the page shown in Figure 15.7 is displayed.
But if you refresh the page within 30 seconds, you'll notice two differences. First, the page will return immediately. Second, it looks like Figure 15.8.
Using VaryByParam to Cache Parameterized Pages
When you start to consider which pages in your application could be cached, you'll probably discover that many of them contain content that's 90% static. The remaining 10% of these pages is likely to contain one or two tiny portions that vary frequently. For example, consider a page in the example Northwind database that displays catalog information, including products filtered by category. The category is set by a parameter in the query string, so the following two URLs will yield different results:

http://www.contoso.com/Northwind/Products.aspx?Category=Seafood
http://www.contoso.com/Northwind/Products.aspx?Category=Produce

The novice programmer might apply the following code to cache these pages:

<%@ OutputCache Duration="30" %>

However, if you were to apply this code you'd quickly discover a problem -- the category filter would stop working. The first version of the page that was displayed would be cached, so the filtering logic would be ignored on subsequent page views.

That's the exact function for which the VaryByParam attribute is used. In this case, we'd change the OutputCache directive to the following:

<%@ OutputCache Duration="30" VaryByParam="Category" %>

The VaryByParam attribute tells the cache system to store a different version of the page every time it sees a new value for Category in the URL. Once this attribute is in place, our users will be able to access a cached copy of the page for both the Seafood and Produce categories.

Keep in mind that storing different versions of the page for each parameter value isn't always the best idea -- in cases where you have many different parameter values, you can quickly use a large amount of memory to hold all possible variations of the page. Use VaryByParam when your pages utilizes a limited number of parameter values.

Note that the number of seconds displayed in the JavaScript-generated time has updated to 59 seconds, while the ASP.NET time still shows 39. What this discrepancy suggests is that the server is sending the same HTML to the client for each request. Suppose that instead of just displaying the current time, we'd bound several GridViews to the results of several expensive database queries. With caching applied to such a page, the savings would be considerable.

You don't have to cache a page for long to see significant performance increases -- a cache of one minute or less can improve your site's performance dramatically. For example, adding a cache to a simple page that just binds a GridView to the Products table in the example Northwind database will increase the performance of that page by about 500%, and for a page that performs a complex database query or processor-intensive calculation, this saving is likely to be amplified even further.

Using Post-cache Substitution
While the OutputCache directive allows you to specify that the cache should vary with a specific parameter, it's not really efficient to cache a multitude of copies of one page that are nearly all identical.

Post-cache substitution, using the Substitution control, allows you to inject dynamic content into a cached page. The result is that you can cache some pages that you probably thought were unable to be cached. Read more on this subject in Scott Guthrie's article on the topic.

One of the problems you might notice with this approach, however, is latency -- the time delay between the point at which your data is updated and the moment when that same updated data reaches a user's browser. In the examples we've looked at in this solution, we displayed the same timestamp for 30 seconds after the page was rendered -- this is great for performance, but might be a problem if your users require the data to always be up to date.

Fortunately, ASP.NET 2.0 has a solution to this problem, which we'll look at next.

How do I refresh my cache when the data changes?

As we saw in the previous tip, judicious use of output caching can provide dramatic improvements in your site's performance. Output caching works by saving the generated HTML for a rendered ASP.NET page. As long as the cache is valid, future requests for that page will just return that stored HTML, rather than processing the page again, which means no page parsing, hits to the database, data binding -- any of those tasks that require precious bandwidth or processor cycles. Used correctly, caching can improve your requests-per-second on a high-traffic page by a factor of 100 or more.

For example, suppose you had a page that contained a DataGrid bound to a table called Products. Without caching, every page request would require ASP.NET to look up the product data in the database, process the page, data bind the product data, render the results to HTML, and output the results to the browser.

If the page was cached, only the first request for this page would require all that work; after that, ASP.NET would just skip all the hard work and serve up the HTML until the cache expired. The end result would be the same whether or not a cache was used: the same HTML would be sent to the browser. However, since a lot less work and network traffic is required to display cached HTML, the server can serve the cached page much faster and to more people.

One problem with cached pages is that they don't pick up data that has changed right away. To continue with the example above: if we were to add a new product to the Products table, it wouldn't show up on the page until the cache expired. Fortunately, ASP.NET 2.0 provides a good mechanism to refresh your cache automatically when the underlying data changes.

Solution

The SQL Cache Dependency was created to solve this problem. A few steps are required to set it up, but once it's up and running, you can use it throughout your whole application.

Using SQL Cache Dependencies with Older Versions of SQL Server
In this book I'll only cover the steps for configuring SQL Server Cache Dependencies on SQL Server 2005; there's a wealth of information on MSDN about how to set it up on SQL Server 2000:

First, you'll need to make sure you've enabled SQL Server Service Broker for your database. You can confirm that with the following query:

ALTER DATABASE Northwind SET ENABLE_BROKER;

Next, you'll need to start the SQL Dependency event listener. The recommended place to make the change that triggers this listener is in the Application_Start method of Global.asax:

Example 15.9. Global.asax (excerpt)

void Application_Start(object sender, EventArgs e)
{
string northwindConnection = WebConfigurationManager.ConnectionStr
➥ings["NorthwindConnectionString1"].ConnectionString;
SqlDependency.Start(northwindConnection);
}

Once the above code has been added to the Global.asax file, our connection can employ an SQL Cache Dependency.

To illustrate how an SQL Dependency is utilized, let's look at an example -- a simple GridView that's bound to a table. We'll drag the good old Northwind Products table onto a new page, then set the following two attributes in the SqlDataSource control:

EnableCaching = "True" SqlCacheDependency =
"NorthwindConnectionString1:Products"

With this simple line of code in place, the GridView won't read the Products table again until it changes. As soon as the Products table changes, though, SQL Server will notify ASP.NET to dump the cache, and the subsequent page request will reload the page from the database. The end result is that our application gains all of the performance benefits that come with caching, but our users will never see stale data.

www.sitepoint.com

Speed Up Your Site! 8 ASP.NET Performance Tips 3

How can I decrease the bandwidth that my site uses?

ASP.NET abstracts a lot of traditional web development details from the developer. Just drag and drop a few controls on a form, set some properties, write a little bit of code, and -- bam! -- you've got a functioning web site.

However, that doesn't mean the resulting HTML markup will necessarily be efficient or small. It's not unusual to see ASP.NET pages that contain more than 100 kilobytes of markup. I recommend that you keep a close eye on the HTML markup that results from your ASP.NET web pages -- to keep these file sizes in check can sometimes require additional effort, which is one reason we covered the topic of web standards in Chapter 9, ASP.NET and Web Standards.

Solutions

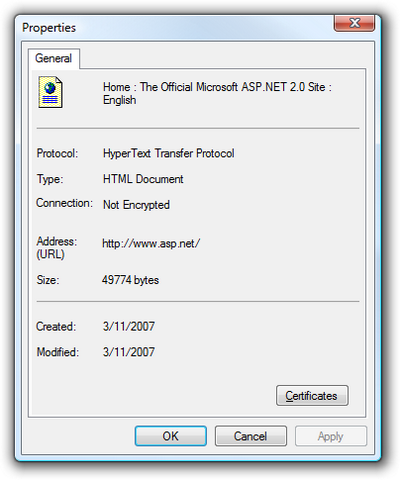
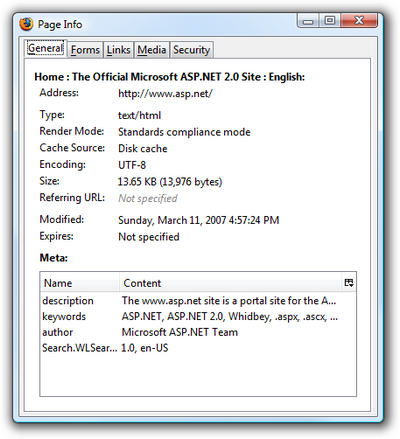
The first rule of ASP.NET bandwidth control is to know how large your pages are. In Internet Explorer, the File > Properties dialog will tell you how many kilobytes of HTML markup the current page has produced, as Figure 15.2 shows. Firefox has a similar dialog, pictured in Figure 15.3, which can be accessed by selecting Tools > Page Info.


However, note that the Size field in Firefox reports a much smaller number than does IE 7 -- 13,976 bytes versus 49,774 bytes. That's because Firefox shows the actual number of bytes that came down over the wire, whereas IE 7 shows the size of the page after it has been received by the browser.How is such a discrepancy possible? Well, the ASP.NET web site uses HTTP compression to decrease the page size before sending the page. HTTP compression is a W3C standard that allows the server to provide a GZIP-compressed version of the HTML content to the client, at the cost of a very minor increase in CPU time. The client receives the compressed content, then decompresses it on the fly before rendering the page. Right off the bat, you can see that this is just one easy way to reduce the amount of bandwidth you use by an impressive 72% -- simply flip the switch to enable HTTP compression for your web site.You can enable HTTP compression in two ways. The first takes place at the web server level; the second is implemented via a custom HTTP module at the ASP.NET application level.

Enabling HTTP Compression Support in IIS 6

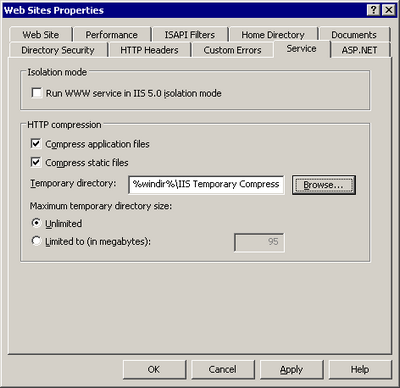
Use the IIS Service Manager to enable HTTP Compression in IIS 6. Right-click the node for your web site and select Properties. The Service tab contains the settings relevant to compression, as Figure 15.4 shows.

Manual Configuration is Only Necessary in IIS 6
That's right: it's only necessary to configure IIS to enable HTTP compression in IIS 6 and earlier, as IIS 7 enables static compression by default. Windows Server 2008 (which had yet to be released at the time of this writing) may offer a user interface to configure dynamic HTTP compression, but Vista's IIS Manager doesn't.

The compression setting available in the GUI works; however, it only affects static content, such as HTML pages and CSS files. This setting won't do anything to compress dynamic content in ASPX pages. We must resort to editing the metabase -- the IIS database for configuration and metadata storage -- to deploy dynamic content compression:

  • Open the metabase in Notepad. For IIS 6, this is located at C:\WINDOWS\system32\inetsrv\MetaBase.xml. For IIS 5, the file is a binary file, so you'll need to download the Meta-data Edit tool instead.
  • Search for the tag. There should be two entries: one for deflate and one for GZIP -- the two methods of compression that IIS supports. By default, IIS uses GZIP; deflate is rarely used.
  • Search for the HcScriptFileExtensions section. Add to the list aspx, asmx, php, cgi, and any other file extensions that you want dynamically compressed. Follow the existing format carefully -- it's return-delimited, and any extra spaces will prevent the file extensions from working. Make the same changes in both deflate and GZIP.
  • Set HcDynamicCompressionLevel to level 9 (it has a default value of 0, which means "no compression"). I recommend level 9, based on several reports that I've read on the Web suggesting that level 10 requires much more CPU time, while offering only a minimal reduction in file size over level 9. Make this change for both deflate and GZIP.

Note that this is a global compression rule that will affect all web sites. This setting is usually what you'll want, since HTTP compression is so effective and the cost is nominal. However, some poorly coded ASP.NET web sites may be incompatible with compression. In those circumstances, you may want to enable or disable compression on a per-site or per-folder basis -- a setting that's also supported by IIS. The easiest way to configure this setting is to use the command line adsutil.vbs utility:

C:\Inetpub\AdminScripts\>adsutil.vbs set w3svc/ (site#) /root/DoStat
➥icCompression False
C:\Inetpub\AdminScripts\>adsutil.vbs set w3svc/ (site#) /root/DoDyna
➥micCompression False

The (site#) number can be obtained from the log properties dialog in the IIS server properties, and usually takes the form W3SVCn, where n is an arbitrary site number.

Enabling HTTP Compression Support in an ASP.NET Application

Perhaps you don't have control over the IIS settings on your server. Or maybe you'd just like a way to enable compression for your specific ASP.NET application. That's possible too.

The open source HttpCompress library is very easy to incorporate into an ASP.NET web site. First, download the latest version of HttpCompress from the official web site.

Place the blowery.Web.HttpCompress.dll binary somewhere logical, and add a reference to it.

Next, add the following compression-specific configuration section to your site's Web.config:

Example 15.5. Web.config (excerpt)


Finally, bring the actual compression HTTP module into the pipeline:

Example 15.6. Web.config (excerpt)


Once this is in place, you should see compressed ASPX content being returned to the browser. To verify that this is the case, use Port80 Software's convenient Real-Time Compression Checker.

One limitation of the HttpCompress module approach is that only ASPX content that forms part of your application will be compressed; the CSS and JavaScript aren't served through the ASP.NET ISAPI handler, and will therefore remain uncompressed. As such, I recommend that you enable compression at the web server level whenever possible, so that these files also gain the benefits of compression.

www.sitepoint.com

Speed Up Your Site! 8 ASP.NET Performance Tips 2

How can I decrease the size of the view state?

One convenience of ASP.NET controls is that they can preserve state across postbacks -- a topic we've covered in depth in Chapter 6, Maintaining State. This, of course, is a feature that comes at a price -- to implement it, we add a hidden field to the page to store the control settings for transmission between the client and server, but depending on the controls the page uses, the view state can sometimes become quite large.

One obvious way to reduce the size of view state is to turn it off if you don't need it. This adjustment can be performed either at the page level, or at the control level. If, for whatever reason, you can't disable the view state (for example, your page uses controls that are dependent upon the view state), there are a few other steps you can take to at least reduce its impact on your page size.

Solutions

You have two options for reducing the impact that view state has on your page size -- either compress the view state, or store it on the server.

Compressing the View State

The following simple CompressedViewStatePage class implements basic GZIP compression on the page's view state. It reduced the size of the ViewState object on my sample page from 20,442 bytes to 6,056 bytes -- an impressive 70% reduction in size! Here's the class in all its glory:

Example 15.3. CompressedViewStatePage.cs (excerpt)

using System;
using System.IO.Compression;
using System.IO;
using System.Web.UI;
public class CompressedViewStatePage : System.Web.UI.Page
{
static public byte[] Compress(byte[] b)
{
MemoryStream ms = new MemoryStream();
GZipStream zs = new GZipStream(ms, CompressionMode.Compress);
zs.Write(b, 0, b.Length);
return ms.ToArray();
}
static public byte[] Decompress(byte[] b)
{
MemoryStream ms = new MemoryStream(b.Length);
ms.Write(b, 0, b.Length);
// last 4 bytes of GZipStream = length of decompressed data
ms.Seek(-4, SeekOrigin.Current);
byte[] lb = new byte[4];
ms.Read(lb, 0, 4);
int len = BitConverter.ToInt32(lb, 0);
ms.Seek(0, SeekOrigin.Begin);
byte[] ob = new byte[len];
GZipStream zs = new GZipStream(ms, CompressionMode.Decompress);
zs.Read(ob, 0, len);
return ob;
}
protected override object LoadPageStateFromPersistenceMedium()
{
byte[] b = Convert.FromBase64String(Request.Form["__VSTATE"]);
LosFormatter lf = new LosFormatter();
return lf.Deserialize(Convert.ToBase64String(Decompress(b)));
}
protected override void SavePageStateToPersistenceMedium(
object state
)
{
LosFormatter lf = new LosFormatter();
StringWriter sw = new StringWriter();
lf.Serialize(sw, state);
byte[] b = Convert.FromBase64String(sw.ToString());
ClientScript.RegisterHiddenField("__VSTATE",
Convert.ToBase64String(Compress(b)));
}
}

To use GZIP compression, simply inherit a specific page from the class, like this:

public partial class MyPage : CompressedViewStatePage

If you're worried about the performance implications of compressing your view state, don't be. It's far more likely that bandwidth is a greater bottleneck than CPU time on any given web server. Although there are exceptions to this rule, the GZIP algorithm is blazingly fast on the CPUs of today. Besides, if your server's CPU operates at 100% all the time, you have far graver problems to worry about than the size of a handful of pages.

This compression algorithm could also be implemented as an HTTP module, which could then be applied to an entire site with a simple Web.config modification. I suggest you try implementing this module as an exercise, if you're keen. The MSDN article on building an HTTP module is a good place to start.

Storing View State on the Server

The second option for reducing view state's impact on page size is to prevent view state data from being sent to the client altogether, and instead store the data on the server.

The following ServerViewStatePage class allows us to use the Session object to store the view state:

Example 15.4. ServerViewStatePage.cs (excerpt)

using System;
using System.Web.UI;
using System.Configuration;
using System.IO;
public class ServerViewStatePage : System.Web.UI.Page
{
private const string _configKey = "ServerViewStateMode";
private const string _formField = "__SERVERVIEWSTATEKEY";
private string ViewStateData
{
get { return Request.Form[_formField]; }
set { ClientScript.RegisterHiddenField(_formField, value); }
}
private string PersistenceType
{
get { return (ConfigurationManager.AppSettings[_configKey]
?? "").ToLower(); }
}

private object ToObject(string viewstate)
{
byte[] b = Convert.FromBase64String(viewstate);
LosFormatter lf = new LosFormatter();
return lf.Deserialize(Convert.ToBase64String(b));
}
private string ToBase64String(object state)
{
LosFormatter lf = new LosFormatter();
StringWriter sw = new StringWriter();
lf.Serialize(sw, state);
byte[] b = Convert.FromBase64String(sw.ToString());
return Convert.ToBase64String(b);
}
private string ToSession(string value)
{
string key = Guid.NewGuid().ToString();
Session.Add(key, value);
return key;
}
private string FromSession(string key)
{
string value = Convert.ToString(Session[key]);
Session.Remove(key);
return value;
}
protected override object LoadPageStateFromPersistenceMedium()
{
switch (PersistenceType)
{
case "session":
return ToObject(FromSession(ViewStateData));
default:
return base.LoadPageStateFromPersistenceMedium();
}
}
protected override void SavePageStateToPersistenceMedium(
object ViewStateObject
)
{
switch (PersistenceType)
{
case "session":
ViewStateData = ToSession(ToBase64String(ViewStateObject));
break;
default:
base.SavePageStateToPersistenceMedium(ViewStateObject);
break;
}
}
}

To use ServerViewStatePage, simply inherit a specific page from this class, like this:

public partial class MyPage : ServerViewStatePage

This class is configured via a single setting in Web.config: ServerViewStateMode. Once you've configured this setting, you'll notice that the ViewState object disappears from the page -- in its place is a simple ID that's used to look up the contents of the page's view state on the server, in the Session object. If you feel uncomfortable storing view state in Session, this class could easily be extended to store view state wherever you like -- in the file system, in the ASP.NET cache, or in a database.

As usual, there's no free lunch here. The decision to push view state to the server and store it in Session has its own drawbacks. For example, the Session object could be lost if the IIS worker process recycles (a loss that does occur every so often in IIS, unless you've disabled this default behavior). Furthermore, any change to the underlying application files (such as editing Web.config, or adding new binaries to the bin folder of your application) will also cause the web application to recycle and Session data to be lost. And if you use more than one web server (such as in a web farm environment) you'll need to manage any shared session state that's stored in a database.

www.sitepoint.com

Speed Up Your Site! 8 ASP.NET Performance Tips 1

Now that you've added the finishing touches to your web site and unleashed it onto the world, fame, fortune, and success will surely follow -- won't it?

Unfortunately, your web application's success can lead to something less desirable -- performance and scaling problems. On a traditional desktop application, one thousand users translate to one thousand client computers chugging away, sharing the load of running your application. The application is effectively spread among all the users' machines. When it comes to a web application, though, those same thousand users are usually serviced by a single machine -- your web server.

Success can come at a cost for web applications: a cost in bandwidth and server hardware. However, there are a few clever ways you can reduce -- and sometimes eliminate -- these problems. We'll take a look at some of the different approaches to improving the performance of an ASP.NET site in this chapter, which has been extracted from The ASP.NET 2.0 Anthology, 101 Essential Tips, Tricks & Hacks. Feel free to download this chapter -- along with three others -- for offline reference.

How do I determine what to optimize?

You want your web application to be the best, right? Like all of us, by "best" you mean "fastest." And what better way to create a blazingly fast application than to optimize everything? Optimize, optimize, optimize -- right? Wrong.

Premature optimization refers to the fixing of a performance problem before you understand the problem, or before there even is a problem, and it's a bad idea.

That's not to say that you should write sloppy, inefficient code. My point is that you should trust the ASP.NET Framework, and make use of the features that make it such a terrific environment in which to develop, until you hit a problem. Once you hit a problem, you should take the time to understand what that problem is, and only then should you start to look at how best to address it. Dr. Joseph M. Newcomer's essay, "Optimization: Your Worst Enemy," gives a fascinating overview of the perils of optimizing in the dark.

The tips in this chapter propose fairly lightweight solutions for some common performance issues. I've steered away from dramatic changes, because I don't want you to end up doubling your development or maintenance time in order to shave a meagre 2% off your page load time. While it is possible to bypass the in-built ASP.NET Page mechanism completely (by using Response.Write, or building an ASHX-based sites), I'm not a fan of these approaches. The ASP.NET system as a whole has been tuned and improved for more than half a decade, and it's reasonably fast straight out of the box. There's a good chance that trying to improve on it will result in a slower and less maintainable web site.

So, with all that out of the way, let's assume that some of your pages are running slowly. How do you figure out what to fix?

Solution

Isolate the bottleneck in your site by measuring the actual speed of the site. This exercise can be performed using logs, database profiling, and tracing.

We've discussed the task of logging using log4net in Chapter 13, Handling Errors. If you suspect that the database is the cause of the slowdown (for example, you know that your application makes use of some large queries), you can either step through the page in debug mode to see whether the database calls are taking a long time to return, or you can use the SQL Server Profiler discussed in the section called "How do I speed up my database queries?" later in this chapter. For a very basic analysis of what's going on in your pages, you can use the ASP.NET trace; while it's not nearly as good as a full-featured logging system, it's easy to implement and will provide you with plenty of timing information.

The first step in using the trace is to get into the habit of adding trace statements. Write to the trace whenever you think there's something you might want to see when you debug future problems. Tracing doesn't have any real performance impact on your site until it's enabled in the Web.config, and when you need to troubleshoot a problem, you'll be glad it's there.

There's more information on tracing in Chapter 13, Handling Errors, but the general idea is that you can write to the Trace object like this:

Trace.Write("Here's a trace message.");

Tracing is disabled by default; when you want your Trace.Write statements to actually do something, you'll need to turn tracing on in the Web.config file, as follows:

Example 15.1. Web.config (excerpt)


In this solution, we'll look at a sample page that performs a few different actions -- it makes a call to a web service, retrieves some data from a database, and throws an exception. Each function that we'll use writes a trace message when it begins and ends, via a straightforward utility method called writeTrace. However, it has one slightly complex aspect -- it uses the System.Diagnostics object to figure out the method name, so we don't have to pass it in. The code for our sample page is as follows:

Example 15.2. Trace.aspx.cs (excerpt)

using System;
using System.Web;
public partial class _Default : System.Web.UI.Page
{
protected void Page_Load(object sender, EventArgs e)
{
hitAWebservice();
getSomeData();
doSomeProcessing();
breakSomething();
displayTheResults();
}
private void getSomeData()
{
writeTrace(true);
simulateWaiting(8000);
writeTrace(false);
}
private void hitAWebservice()
{
writeTrace(true);
Trace.Write("A message to demonstrate tracing.");
simulateWaiting(2000);
writeTrace(false);
}
private void doSomeProcessing()
{
writeTrace(true);
simulateWaiting(1000);
writeTrace(false);
}
private void displayTheResults()
{
writeTrace(true);
simulateWaiting(500);
writeTrace(false);
}
private void breakSomething()
{
writeTrace(true);
try
{
int superBig = int.MaxValue;
superBig += 1;
}
catch (Exception ex)
{
Trace.Warn("Exception", "Oops", ex);
}
}
private void writeTrace(bool enteringFunction)
{
if (!Trace.IsEnabled)
return;
string callingFunctionName = "Undetermined method";
string action = enteringFunction ? "Entering" : "Exiting";
try
{
//Determine the name of the calling function.
System.Diagnostics.StackTrace stackTrace =
new System.Diagnostics.StackTrace();
callingFunctionName =
stackTrace.GetFrame(1).GetMethod().Name;
}
catch { }
Trace.Write(action, callingFunctionName);
}
///


/// Wait a bit.
///

/// Time in milliseconds to wait.
private void simulateWaiting(int waitTime)
{
System.Threading.Thread.Sleep(waitTime);
}
}

Right, we've got our trace statements in place. Now, let's assume that this page is taking abnormally long to load, and we'd like to get to the bottom of the problem. With tracing enabled, we can simply load the page, then browse to Trace.axd within our web site; it's at http://localhost:1209/MySite/Trace.axd.

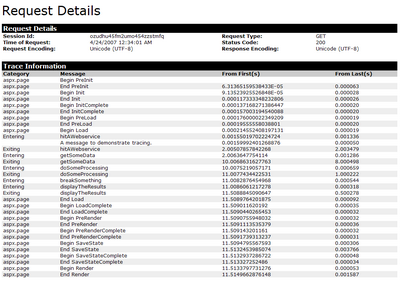
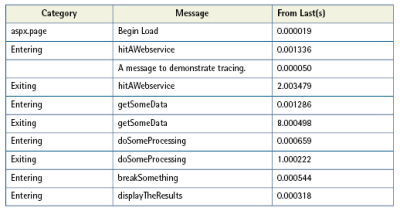
Figure 15.1 shows the first part of the Trace.axd output that was returned from the previous code.

Table 15.1 shows the relevant portion of the trace output.

Right away, we can see which aspect of our page load is taking the majority of time -- getSomeData takes eight seconds to execute. Without this information, we might have assumed the web service call was at fault and spent valuable time solving the wrong problem. This example shows how, armed with some real information, we can begin to fix the right problem.


www.sitepoint.com

16 Design Tools for Prototyping and Wireframing

In recent years the number of tools available to help you document and design your web site has just exploded. It seems that we all need a wireframing or prototyping tool at our fingertips (at least in the design arena). So in order to save you the hard work required to find one, I've assembled this list. It can be expanded upon, so if you use an unlisted application, please let me know and I’ll add it to the list.

The tools tend to fall into two categories:

  • purpose-built applications
  • multifunctional applications

Within these two groups I’ve found that usefulness can vary markedly among tools; some are only suitable for diagramming and wireframing, while others focus only on prototyping. The best are blessed with both capabilities and more.

Purpose-built Applications

1. Visio

I will state upfront that I’m not a big fan of Visio (price: from $US259, demo available); I’ve used it from time to time on various projects, but I’ve always found it fiddly and time-consuming.

Visio first started as an add-on to MS Word, filling the need for a business and technical diagramming tool and eventually graduating to separate product status. Visio’s power remains in the area of diagrammatical documentation; as a prototyping tool its functionality is limited at best. However Visio, like Omigraffle (below), is particularly suited to content map generation from CSV files. In the recent version, Visio 2007, the addition of the UML plugin has allowed for smoother importing of UML.

Visio has also spawned a number of add-on tools; Swipr (which is free) is the most relevant as it allows for rapid export of wireframes and screen flows into a clickable HTML prototype. This is very handy for creating the entire prototype in one go and not having to link it together after exporting.

Visio is only available on the Windows platform.

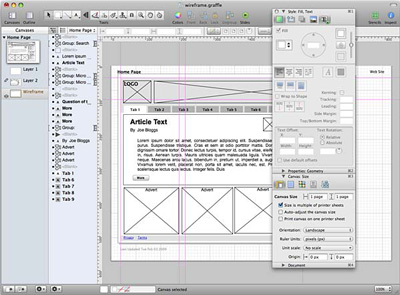
2. OmniGraffle Pro

Yes, I’m a little biased here; I do like OmniGraffle (price: $US199, demo available), especially the latest version. OmniGraffle is best suited as a tool for wireframes, screen flows, and content maps. It can also be used as a prototyping tool, with the ability to link canvases (pages). This allows you to produce a complete HTML prototype in one operation from OmniGraffle. You can, via the use of the notes function, easily annotate and complete the specification documentation for your prototype objects as you go.

OmniGraffle provides an extensive series of Visio import and export functions, allowing for cross-platform team compatibility. It also allows you to import your base content structure from a CSV or XML file via a fully customizable rule-based layout function; this can be especially handy for documenting large and ever changing content maps.

Support for OmniGraffle is supplemented by a large online community, as is evidenced by the resources available at Graffletopia. OmniGraffle is only available for the Mac.

3. Axure RP Pro

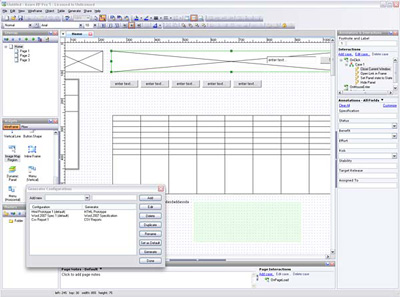
Axure (price: $US589, demo available) has rapidly become the darling of the user experience and information architecture communities. The application allows you to construct wireframe models, document functional specifications, and generate prototypes, all using a built-in version control system.

Axure is an extremely rapid wireframing and prototype generation system that I’ve personally found pays for itself very quickly—in terms of increased productivity—despite its mid-level price tag.

Axure allows for complete flexibility when designing an interface, from standard widgets, to custom builds, to an open-ended canvas. However, Axure’s true killer functionality is the generation of rich HTML prototypes and Ajax-like interactions between states. It’s a little like Dreamweaver and its JavaScript generation, but good.

A word of caution: if you do go looking under the hood of your HTML prototype, the code it generates is not for the fainthearted and should never be considered for use beyond a testing prototype.

The one downside for me is that it only runs on Windows. If it was available on the Mac, I would be very happy with Axure.

4. iRise Pro

iRise (price: from $US6,995, demo available) was the first product of its type to market, and has advantages and disadvantages. The iRise product suite is very Axure-like in its functionality, and as the price suggests, is clearly geared towards an enterprise-level market.

Price aside, the one thing that I dislike about iRise is the user interface. Now this may be a personal preference, but you would think that if you’re going to be producing a tool for user experience professionals that you would at least make sure the UI is right. iRise suffers from a legacy interface that uses older GUI methods and techniques. I believe it’s in real need of an overhaul.

Still, if you’re looking at working with very large teams and need a comprehensive suite of products to span your entire prototype development life cycle, then iRise is worth a look.

5. Pencil

Pencil (free) is a Firefox plugin that professes to enable you to build wireframes and prototypes. As a prototyping tool it’s quite good, allowing you to quickly put together a reasonably high fidelity mockup. However, be aware you’ll still need to produce the visual design elements for Pencil, as it relies on dragging and dropping pre-made graphical elements.

The output wireframe elements that ship with Pencil do tend to be based on the look and feel of a Windows desktop application. This really is undesirable for a web application, however you could modify this with your own page elements.

Another downside of Pencil is that its export functionality provides only a few image formats. This means that Pencil falls short of being a real interactive prototype development tool.

6. SmartDraw

SmartDraw (price: from $US297, demo available) is marketed at the business diagramming sector, it’s not really a dedicated wireframing and prototyping application, but that doesn’t mean that it should be dismissed completely.

It’s at the lower end of the market so you would expect a reduced functionality set compared to Axure. SmartDraw is aimed at the same market as Visio or OmniGraffle, with a standard template suite and few auto generation features. For prototyping SmartDraw allows you to add simple dynamic elements to a page, with the final output being a PDF file. There is no allowance for the representation of the transition between states on prototypes.

SmartDraw is only available for Windows, offering a degree of MS-Office Suite integration.

7. MockupScreens

MockupScreens (price: from $US79, demo available) is a Windows-only application. It focuses primarily on the building of simple prototypes from a series of wireframes based around common screen elements.

The prototyping functionality is limited, and only available within the MockupScreens application. I do note that you can export the screens as image files or as a very limited HTML rendering. This product is very much at the bottom end of the market in terms of cost and functionality, however this may suit your needs.

8. Balsamiq Mockups

Balsamiq Mockups (price:$US79, demo available) is an interesting product running on Adobe AIR. Its representation of the interface elements has a refreshing hand-drawn, sketch-like quality to them. This does help promote the degree of changeability of the wireframes, as they look very much like a draft. If you lack the skills to create hand-drawn sketches then Balsamiq is a useful tool, as it allows you to produce quality roughs. Balsamiq also offers a standard collection of interactive screen elements, which is helpful to start off with.

Balsamiq Mockups

Balsamiq Mockups also introduces BMML (a flavor of XML), which enables you to export your wireframes.

However rather than a prototyping tool, it’s more targeted at communicating the concepts of a proposed interface via wireframing and the like.

9. Lucid Spec

Lucid Spec (price: from $US499, demo available) from Elegance Technologies is a windows-based .NET application that’s almost a clone of Axure. It has a series of rapid screen drawing tools and a prototyping testing mode they call “instant application simulation,” which can be viewed in full screen mode or within the application. There’s even a stand-alone Lucid Spec Player that allows you to conduct prototype testing without the need for the full application.

The one aspect that Lucid Spec lacks is allowance for those between state, Ajax-like interactions. The interactions presented are very much based on the traditional, page-by-page screen flow.

10. ConceptDraw Pro

ConceptDraw Pro (price: from $US249, demo available) promotes itself as an alternative to OmniGraffle and Visio, aiming at the business and technical diagramming market.

I’m pleased to say it does live up to these claims with various functions that are comparable to its competitors.

In addition to this it also has its own scripting language, ConceptDraw Basic. It’s possible with this scripting language to generate complex, customized prototypes. If you want to avoid going down the custom scripting route, you can use the standard export to HTML or PDF for prototyping.

ConceptDraw also has a Web Design plugin for us web designers, WebWave Plugin (price: from $US99, demo available). The WebWave Plugin streamlines the design process, allowing easier development of site and content structures to the mocking up of medium resolution wireframes—a bit like coloring in the gray boxes. You can then take the final mockup pages from ConceptDraw and produce the CSS and pages for a prototype.

ConceptDraw Pro is available for both Windows and Mac platforms.

11. iPlotz

iPlotz (price: free to $US99 per year) is a new web application aimed at the design and developmental life cycle market. It bundles project management functionality as well as wireframing, collaborative commenting, and testing prototype generation. Being browser-based this application can be used anywhere there is web access, allowing for true remote collaborative design and implementation.

Visually, iPlotz presents itself as an attractive and professional application. It’s a Flex application, and hence all the features from management to preview are accessed via the Flash interface, and so will require the latest Flash plugin, an easy ask for a designer or developer.

iPlotz

The rapid generation of wireframes within this application reminds me of the speed and ease of use of Axure, but with the hand-sketched look of Balsamiq Mockups. Another nice thing about iPlotz is that its focus is just on web design, nothing else. This is a pleasant change.

It’s early days for iPlotz, however there are a few items that do need addressing. The commenting interface can be a little distracting; the comments tend to crowd the screen if you have more than a few. There is only one font face available—comic sans. Also, at present the export functionality is limited to JPG, PNG, or a PDF. Still, this application is definitely one to watch.

12. Go Analogue

There is a lot to be said for stepping away from the computer and doing the initial wireframing with pencil and paper. You could extend this to paper prototyping as well. It’s fast (to build), cheap, and easy to use. For groups you can prototype using a large whiteboard, markers, and a few magnetic page elements. Both these methods tend to be highly interactive with the audience and can bring a moderate degree of humor to an otherwise dry process.

There are downsides to these analogue methods as it can be slow to produce and revise the screens, as well as being easily disregarded by management because of the disposable nature of the final product. I have found that they’re useful for the generation process, but the final documentation needs to be presented in a formal tool.

Multifunctional Applications

13. PowerPoint or Keynote

Often an organization is unable to afford specialized software for prototyping or wireframing. This is where applications like Microsoft PowerPoint (price: from $US229, demo available) or Apple Keynote (price: from $US79, with iWorks, demo available) can be used. Both these packages are well-suited to producing very rapid, simple prototypes. They’re highly compatible with the wide range of most teams’ skill set, so by using these tools you can usually have any team members immediately contributing to a prototype with ease. The downside is many of the finer interactive elements, such as between states, are missing, and your logic path tends to be of a very linear nature. Still, you can often export the prototype to HTML or Flash as well.

14. Adobe Fireworks

Adobe Fireworks (price: from $US299, demo available) is a tool I’d yet to consider using for prototyping—being a Photoshop devotee from way back. However, all this has changed with the release of Adobe CS4.

Fireworks is now shaping up to be a viable tool for producing both low and high fidelity prototypes, using nested symbols, smart guides, as well as generating all the code behind it. As usual this code suffers a little from the automatic generation process, so it’s going to need to be massaged into a reasonable shape if you want to reuse it for your final production model.

A side note here is that I know of others also using Adobe Photoshop and Illustrator, or Microsoft Expression Studio as wireframe documentation tools. These tend to work well when you have a good library of objects, such as brushes and the like.

15. HTML

If you have the skills, you could just develop your prototypes in HTML. This is especially useful if you are producing the front-end code that’s going to be consistent in standards with the final web site anyway. Doing it this way will save you time and money by reducing the overall production time.

These days—with the use of various jQuery plugins—you can represent nearly all the between states or major interface types that have been proposed with ease.

Functionality is also available via the use of Protonotes; you can have your team collaborate on your prototype by leaving dynamic, virtual Post-it like notes.

Even if your skill set falls short of being technically-oriented, you could use developmental platforms like Adobe Dreamweaver and its improved JavaScript Spry components to produce a reasonable visual representation.

I will admit I have often done this, quickly pulling together a working HTML prototype from within Dreamweaver with little regard to the underlying code. Remember, it’s just a prototype and so only has to be visually representative of the final product. I shudder to say this, but in this case the code is secondary.

16. Adobe Flash

Adobe Flash (price: from $US699, demo available) is a great tool for producing rapid interactive prototypes or screen flows, but is unsuitable for wireframing and specification documentation. However, via the use of the library objects, the timeline, and drawing tools it’s very easy to produce an interactive prototype. The one area Flash is especially suited is in the reproduction of those in-between states that many static presentation tools lack.

This functionality of using Flash as a prototyping tool is now being extended by Adobe with the introduction of an entirely new tool for designers and developers alike: Catalyst. Now I’ve yet to try Catalyst personally—I can only go off the Adobe video and the reports from colleagues that have seen it in operation. But trust me here, this application is going to change the marketplace and make RIA development the next big thing! There, I said it; some of you will disagree, and that’s fine.

Another thing that Catalyst is promising for people like me that use a Mac, is that it will give us the jump on our colleagues using Axure. We shall see on that one.

www.sitepoint.com